")
")

Once your Joomla website is installed, you’re ready to create your first content. Joomla has countless possibilities to make beautiful articles and a lot of ways to present your content. This is great if you know how to use them, but can be a bit overwhelming if you don’t. This article shows you how to add your first article and guides you through some of the possibilities you have.
Where can I add articles?
The simplest and obvious way is the “+” Button in the left menu Item or in the Dashboard or the “New” button in the articles list.
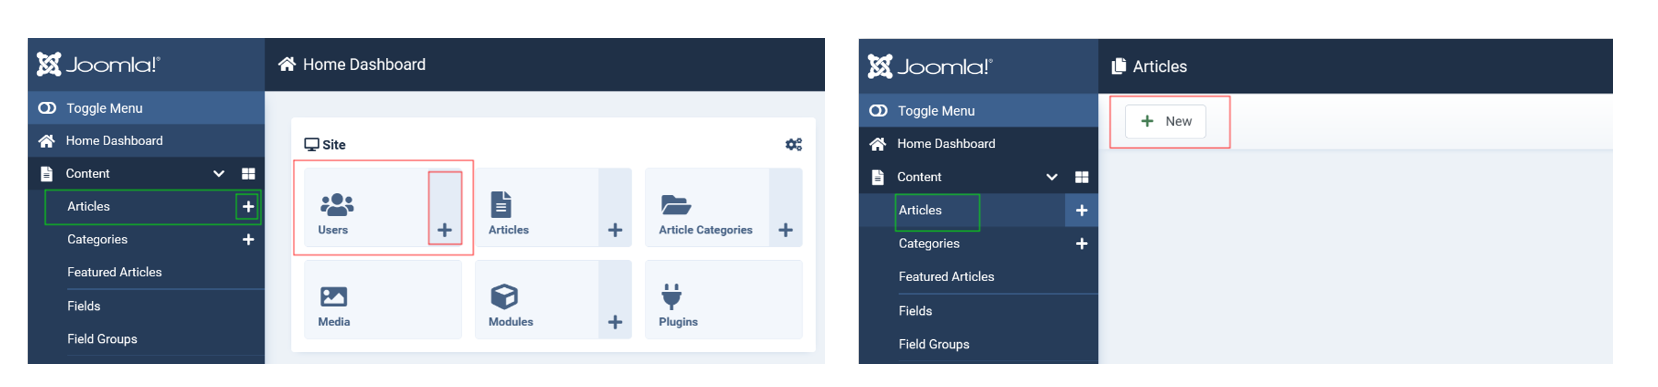 Screen: Add an article.
Once you’ve clicked the button, you can create your article.
What’s in the article editing view?
First a Top Bar with actions: this is what you can do with your article.
Tip: Saving your work from time to time with the save button is a good idea!
Tip: Look at the right side: Every screen in Joomla has a Help Button. Try it!
The Title is the name of your article - choose it carefully: meaningful and not too long. If you have hundreds of articles, you will understand this recommendation. Next to the title is the alias field, you can let Joomla generate that for you. It will be part of the URL.
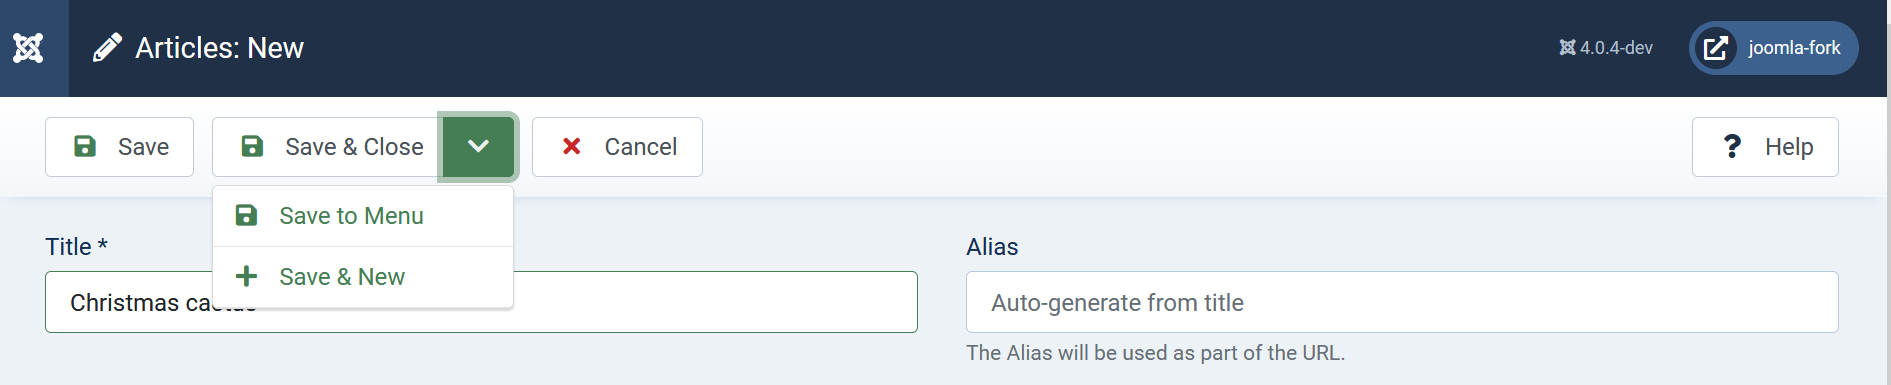
Screen: Top bar of an edit form.
An article form has several tabs. Their number may vary, depending on the settings of your site. Let us start with the first one - the content. Maybe you do not need to open the other tabs at all - Joomla has default settings that fit for the start.
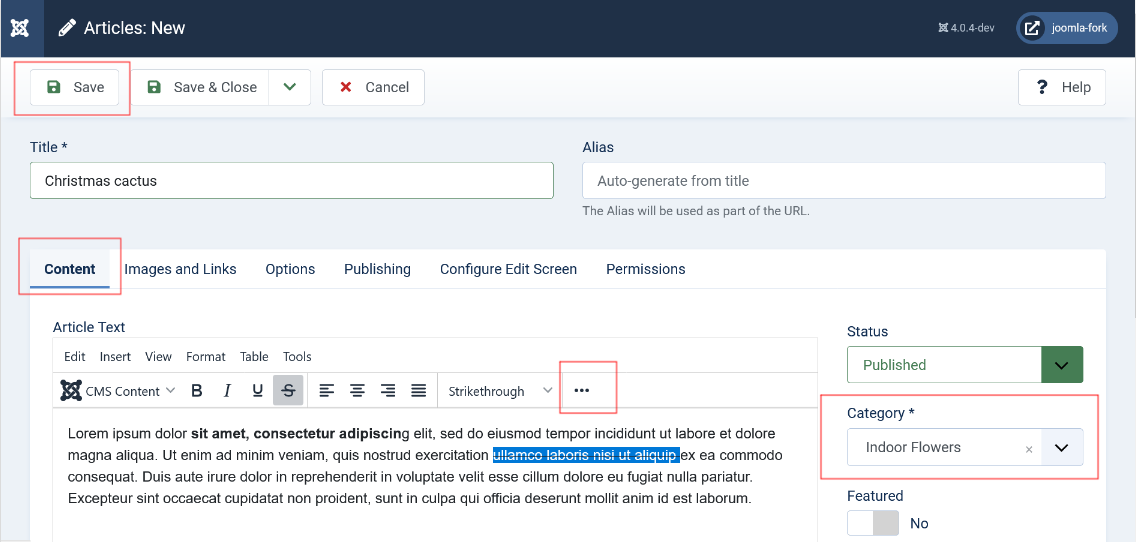
Screen: Write an article
First, choose a category the article belongs to. I recommend reading about categories in this article. The other settings are not relevant at this time. Now you can write your text in the large text field.
The editor is by default the TinyMCE Editor. You can do some formatting in your text as you know from Word. If you are used to Joomla 3 and you have a feeling some buttons are missing, click on the mini menu (three dots) n the button menu line.
Plug in other content
Our article is rather uninteresting so far and we want to spice it up.
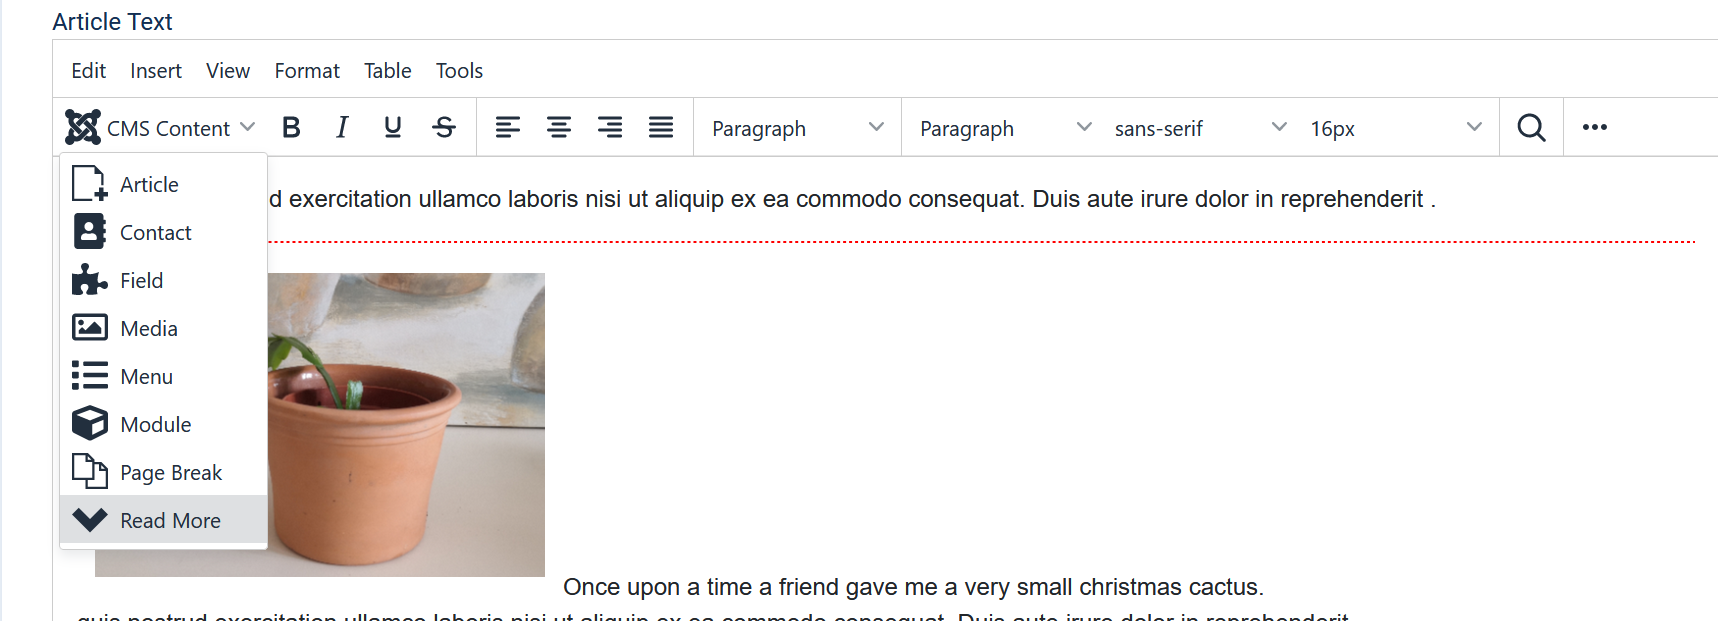
For this you can use the button for CMS Content. This is a miracle bag. It allows you to plug in different content to your site: for example images, links to other articles, modules and more. Try it!
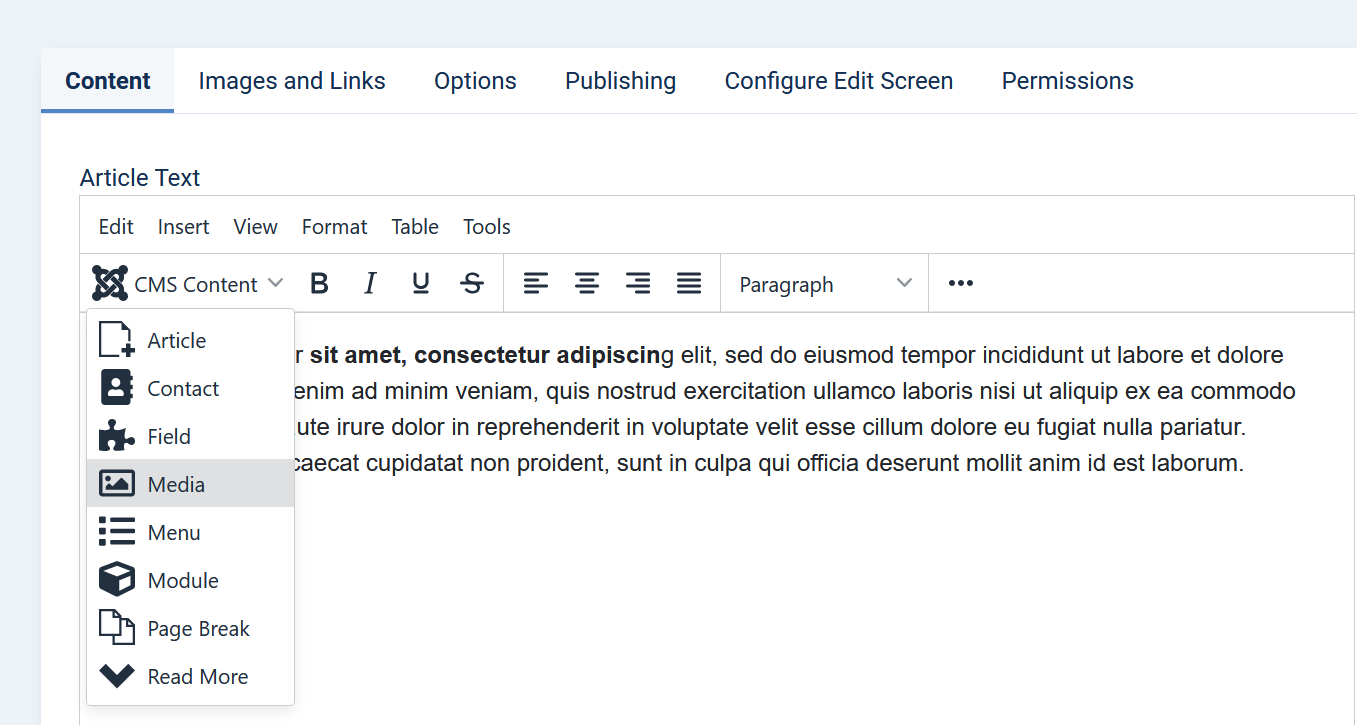
Here we add an image.
Set the cursor on the place where you want the image to appear and add your image button “Insert Media” to your article.
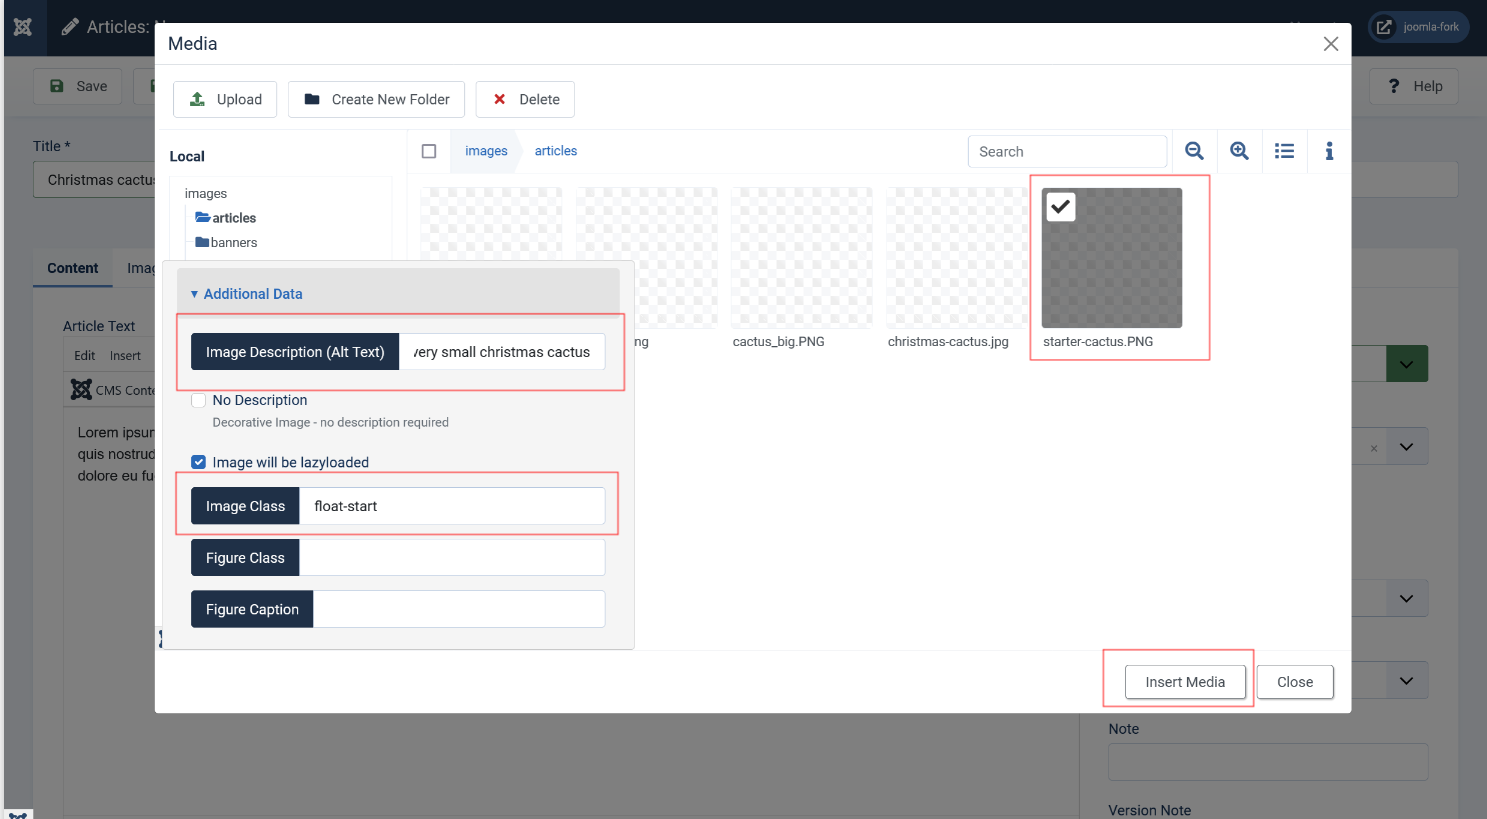
Screen: Insert an image
We assume that the image is already in your images folder and you simply can select it. Don’t forget the description! It is important for accessibility - but this is another story.
We want to have the image with class “float-start” (this means: it is pulled to the left). Now insert the image with a click on the Button “Insert media”.
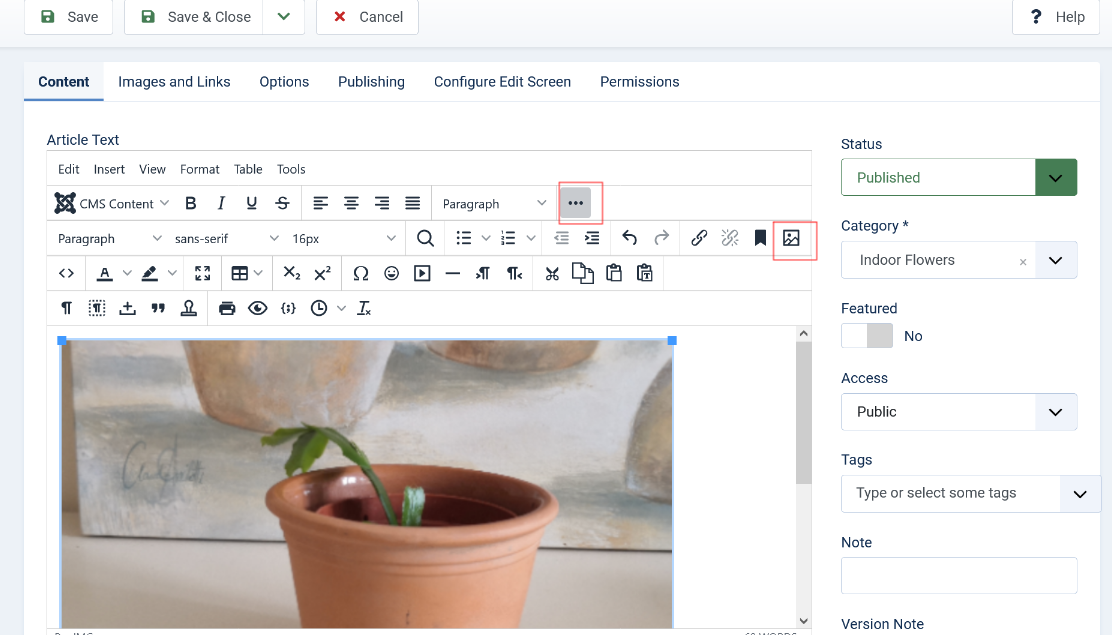
And here we have - oops! That’s not what I expected! The image is too big. No problem. Mark the image by clicking on it and activate the image button in the editor. You get a small form with two Tabs: General and Advanced.
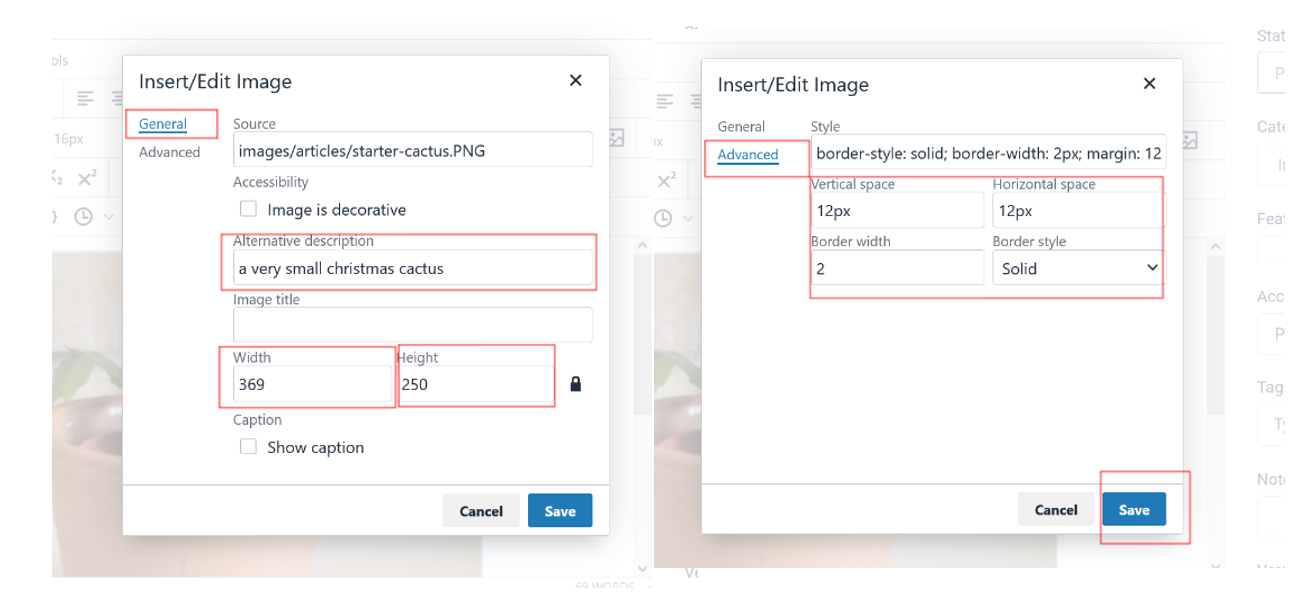
On the General tab you can define a width and a height. In the Advanced tab, you can add a border to your image and add some margin to keep it away from the text. Just save it and see the result. Be aware that the article you see in the form is not what the user will see on your site.
The Preview Button in the button bar lets you see how your article will look in the frontend (note: your preview can vary, depending on your site template).
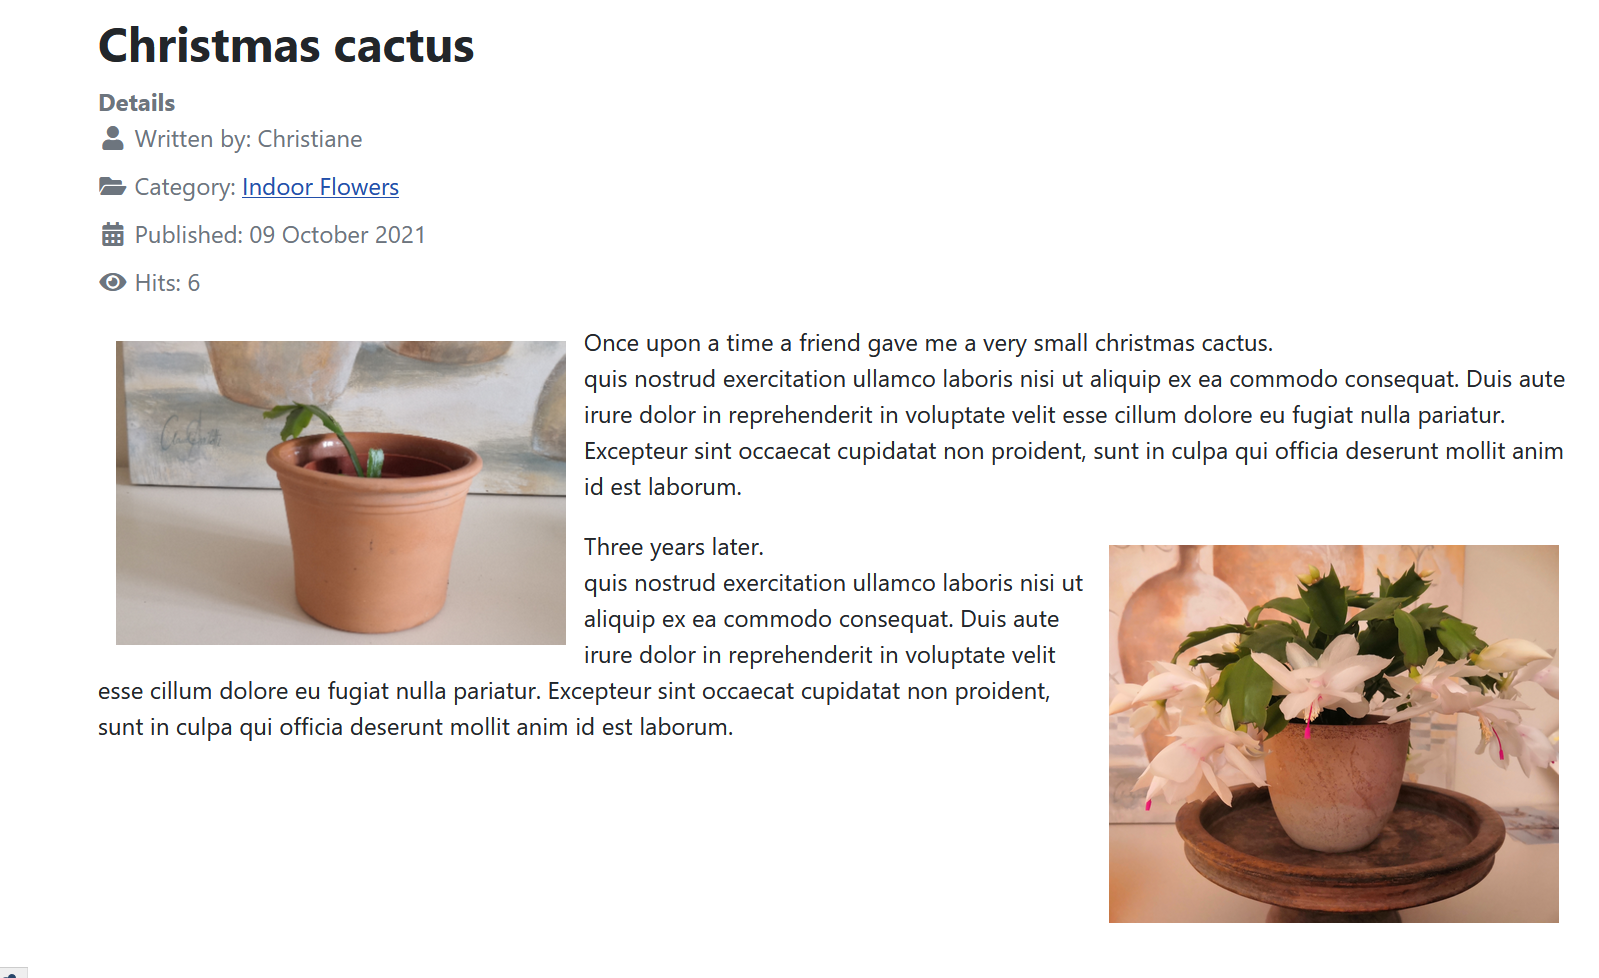
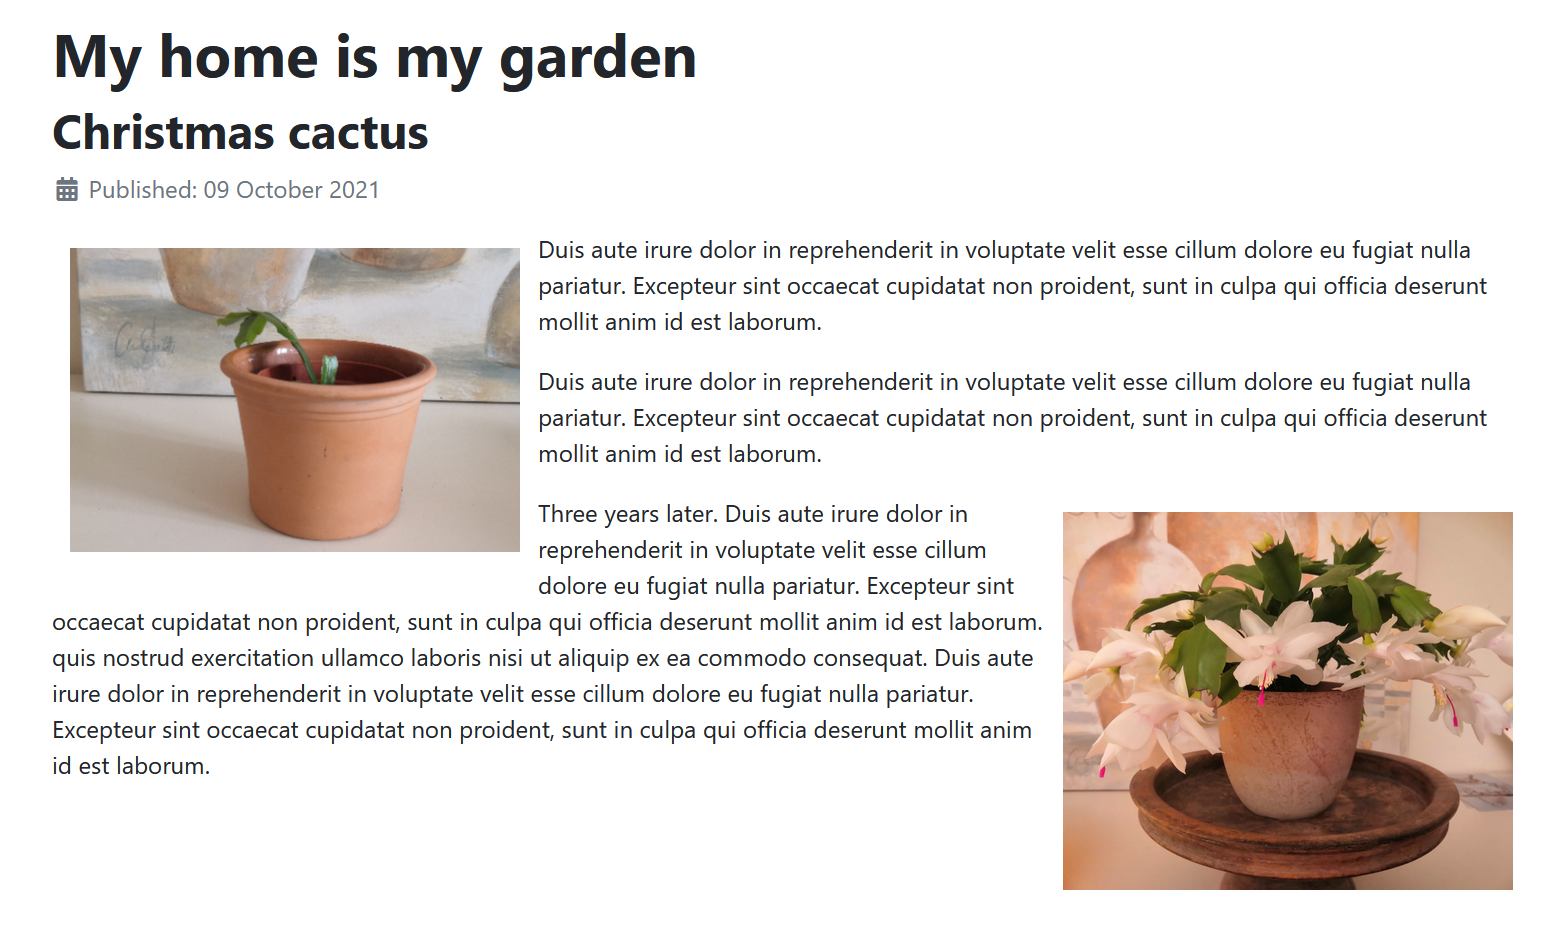
That’s already quite good, but my article will be part of a blog layout about my indoor plants, a page with multiple articles on it.
How to make the article ready for a blog layout?
A blog layout means that a short teaser of your article appears in a blog overview and a button “read more” opens the full article. The teaser is called “introtext”.
To separate your article into an intro text and a full text, set the cursor where you want to separate your text and click the “Read more” button. The red line indicates where your text is separated.
Screen: Add an intro text and a read more tag.
Tip: First make a line break, don’t place it in the middle of a text!
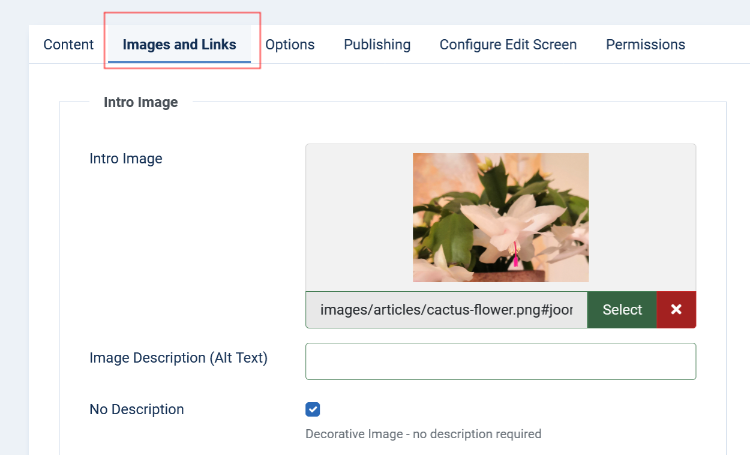
In blog layouts, in general, small images are eye-catchers for the reader and are part of standardised layouts. For this purpose, the best practice is to use the intro image in tab Images and Links.
Select your small image here.
Save the article. Now you can see the result in your blog layout.

This looks much better, but not perfect yet. The details section contains stuff I don’t really want to show up!
How to get rid of “Details”
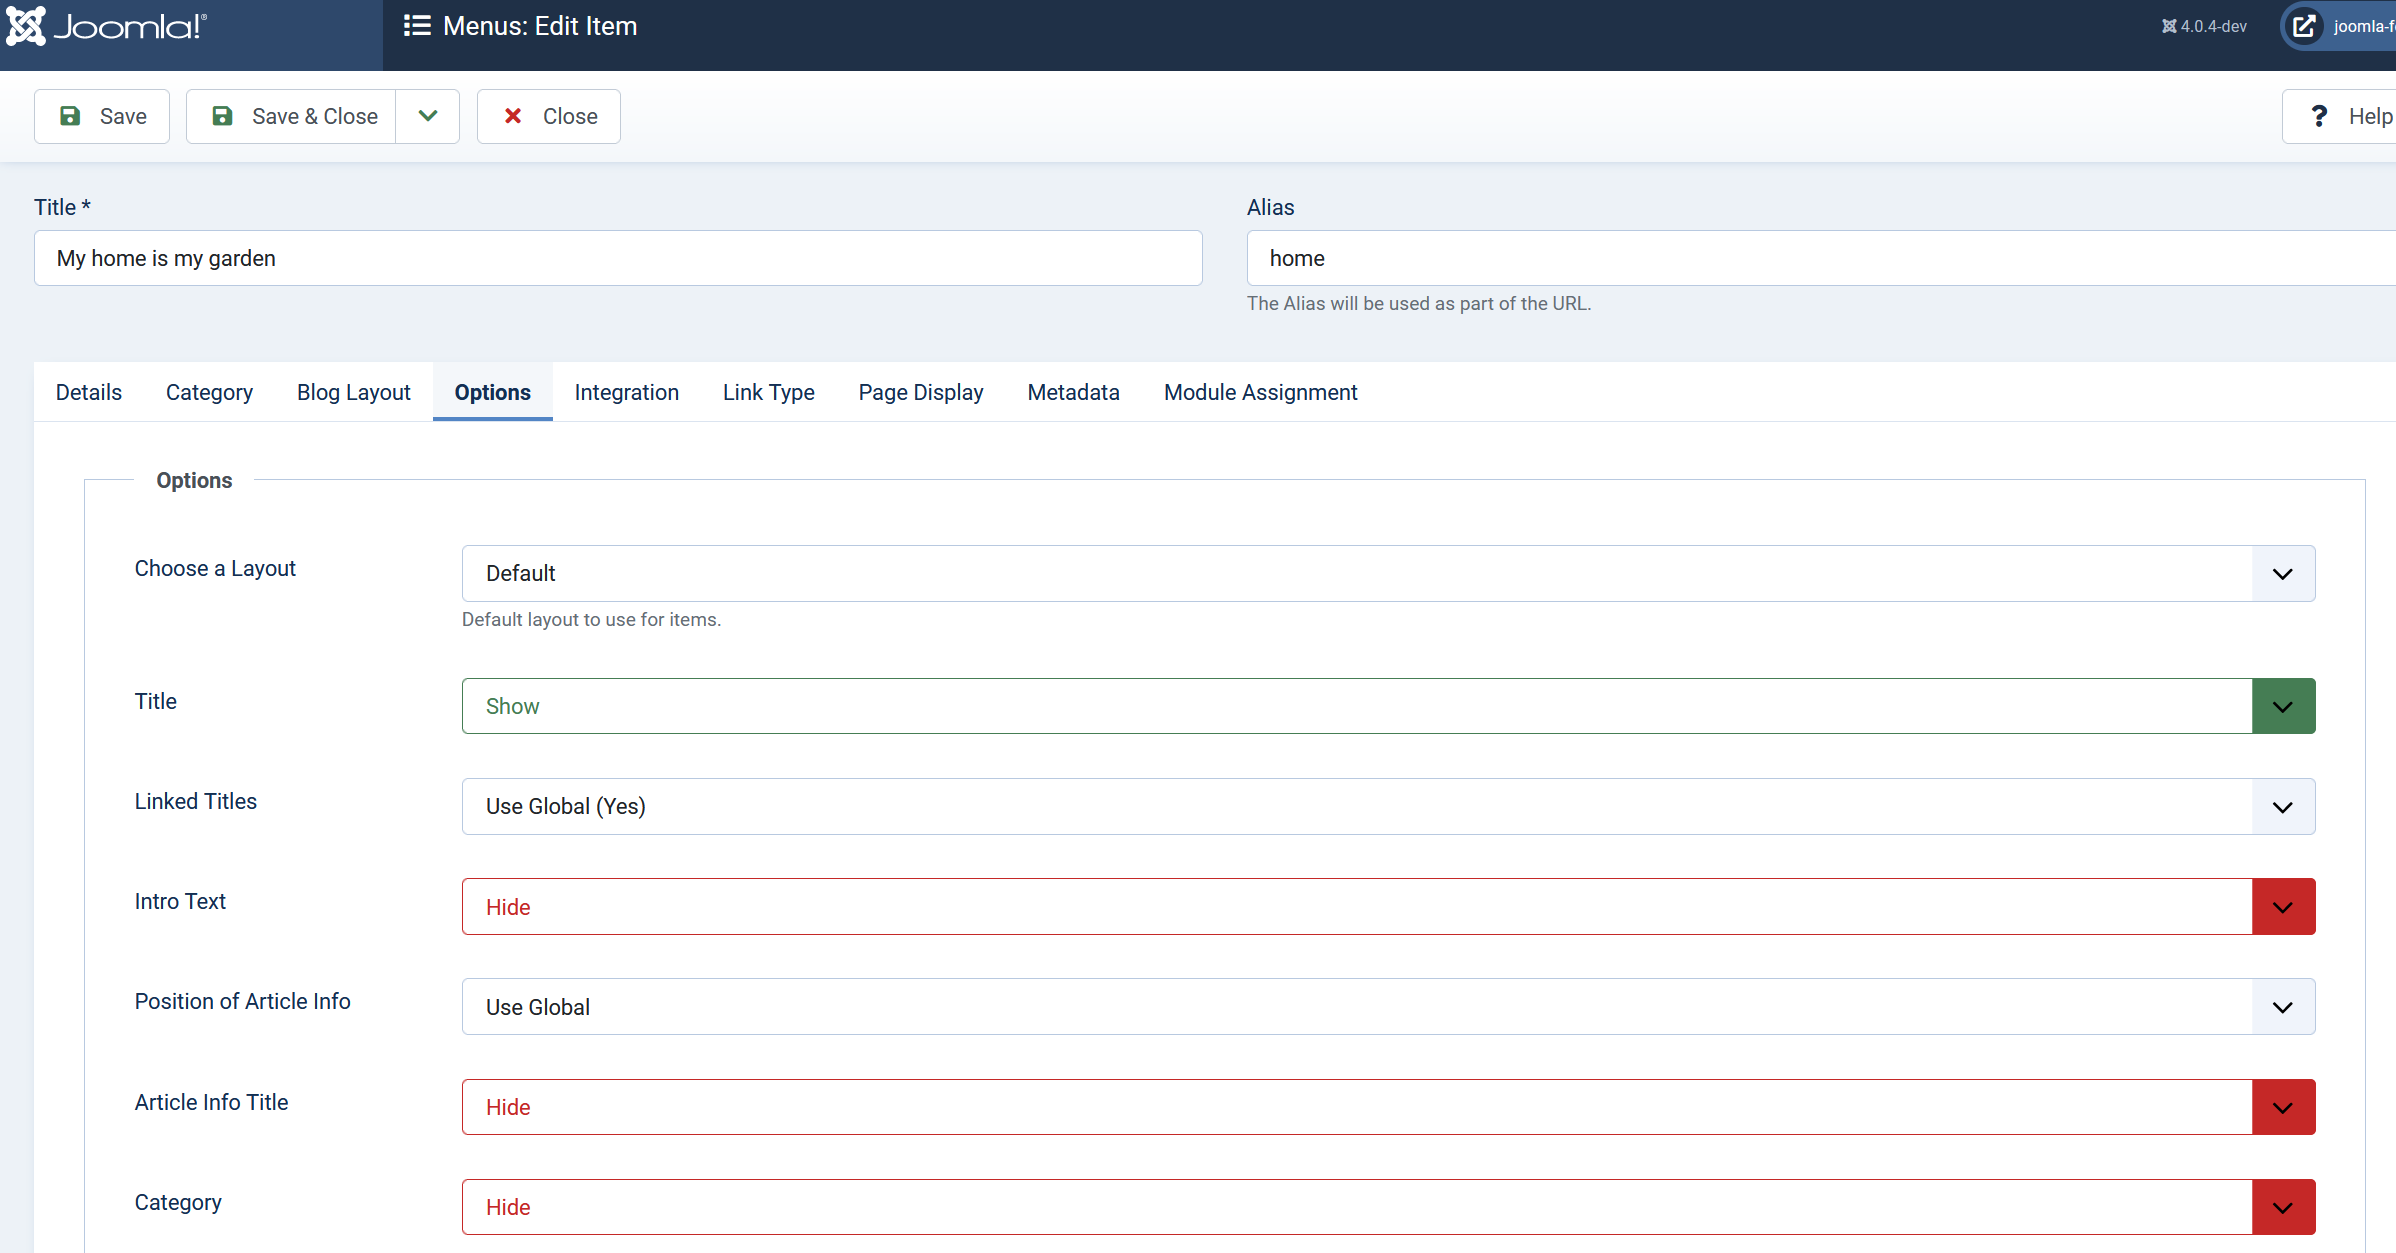
Here we must digress a little bit. The way articles and blogs are displayed is controlled via options.
The user reaches a blog via a link in the navigation, and the options of this link are responsible for this layout.
You can learn more about menu items in one of our next Explore the Core articles (or if you can’t wait, in this article about menus in Joomla 3 - for Joomla 4 it pretty much works the same way). Here I show you where you can hide the details - scroll down on this page and hide whatever you don’t want to see. What you choose here applies to all articles shown through this menu item.
If you want to change this site-wide, you could do so by going to the list of Articles and clicking on the options button in the top right corner.
Tip: the menu item settings rule. So if you set something to “hide” in the Article options, and to “show” in the menu settings, it will be shown for everything on the content the menu item applies to.
We did it!
The teaser looks good now
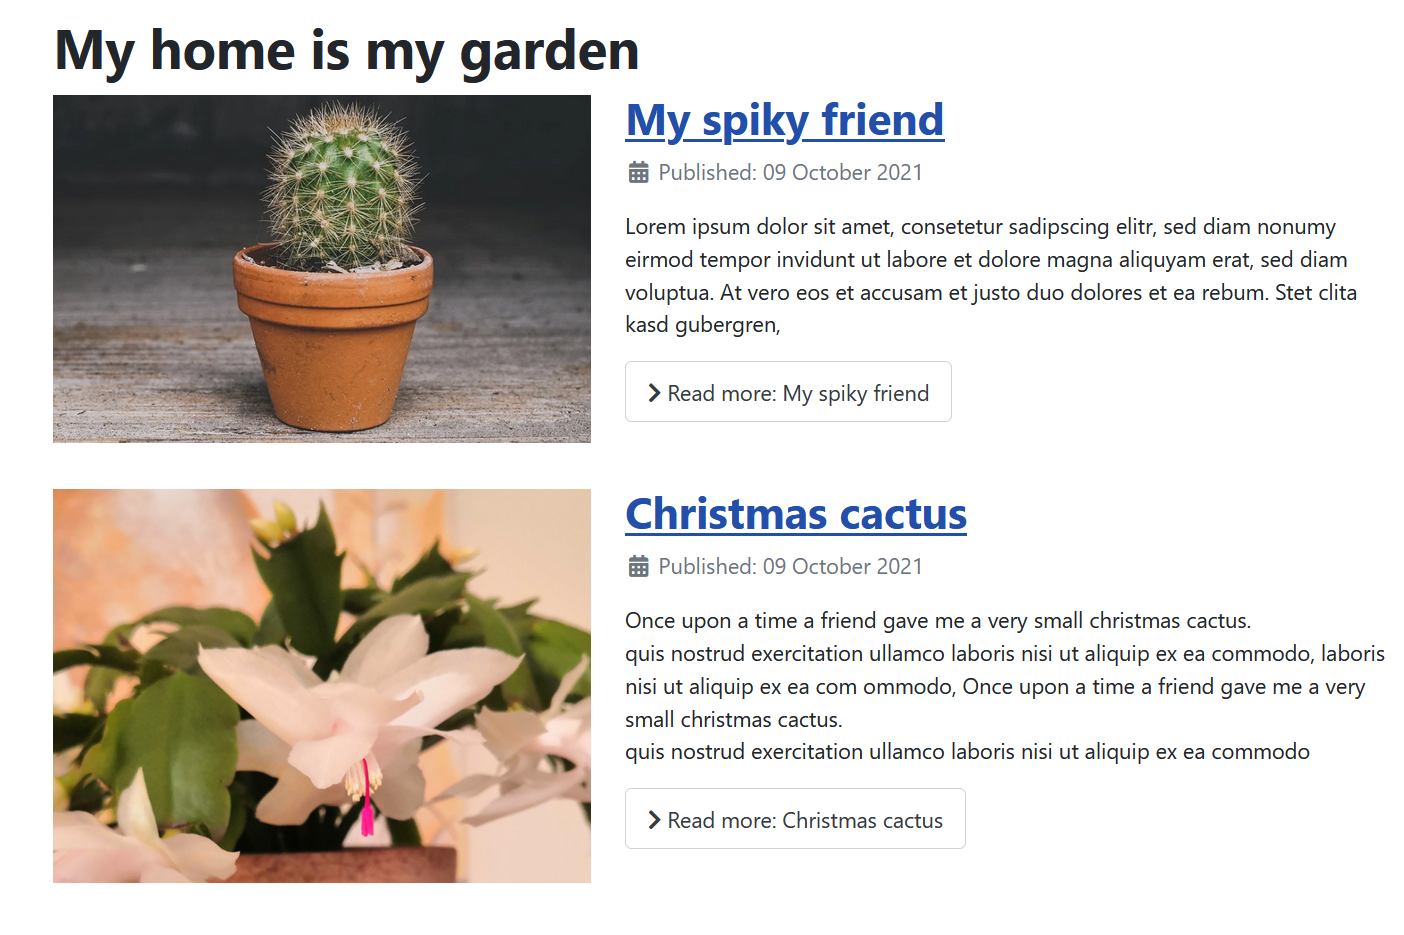
Click on the “Readmore” button and see the full text:
Can I get more examples, please?
If you are new to Joomla, you can let Joomla add some sample content to your site. That way you have a few articles and can play with all the options and settings.
On the dashboard, you find a button for installing Blog Sample Data - see the next screenshot. This will add some tags, fields, categories, articles, modules and a sample workflow to your site.
In my Dashboard, I changed the quick icons, so they show the number of articles and categories. If you want to know how I did that, I recommend reading the article for changing Quick icons and the customisation of dashboards here.
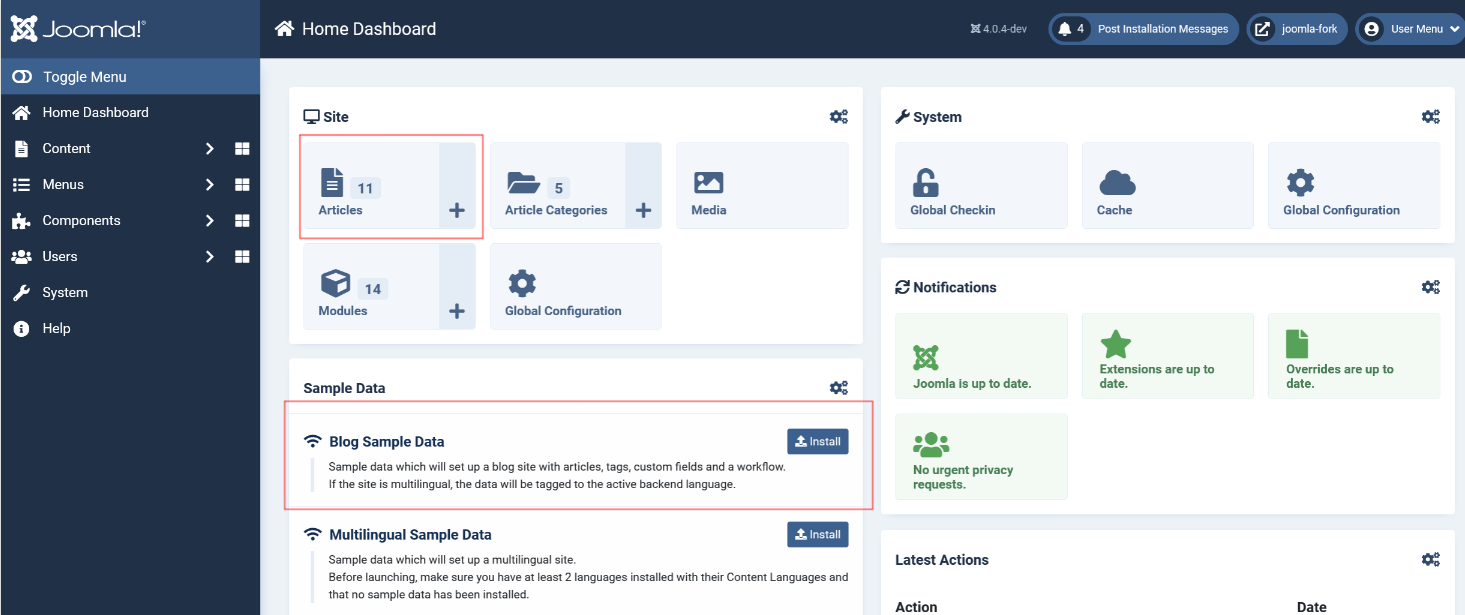
Screen: Sample Data are installed and Items Count activated on Quick Icons
Where do I find my articles?
Click on the Articles button above and you will see it. Here you can
- Hide or publish an article? Click on the respective status button.
- Edit the article? Click on the title.
- Operate on multiple articles? Mark the checkboxes and then select an action from the menu on top.
- Want to see the category? Click on the category name below the article.
- And much more…
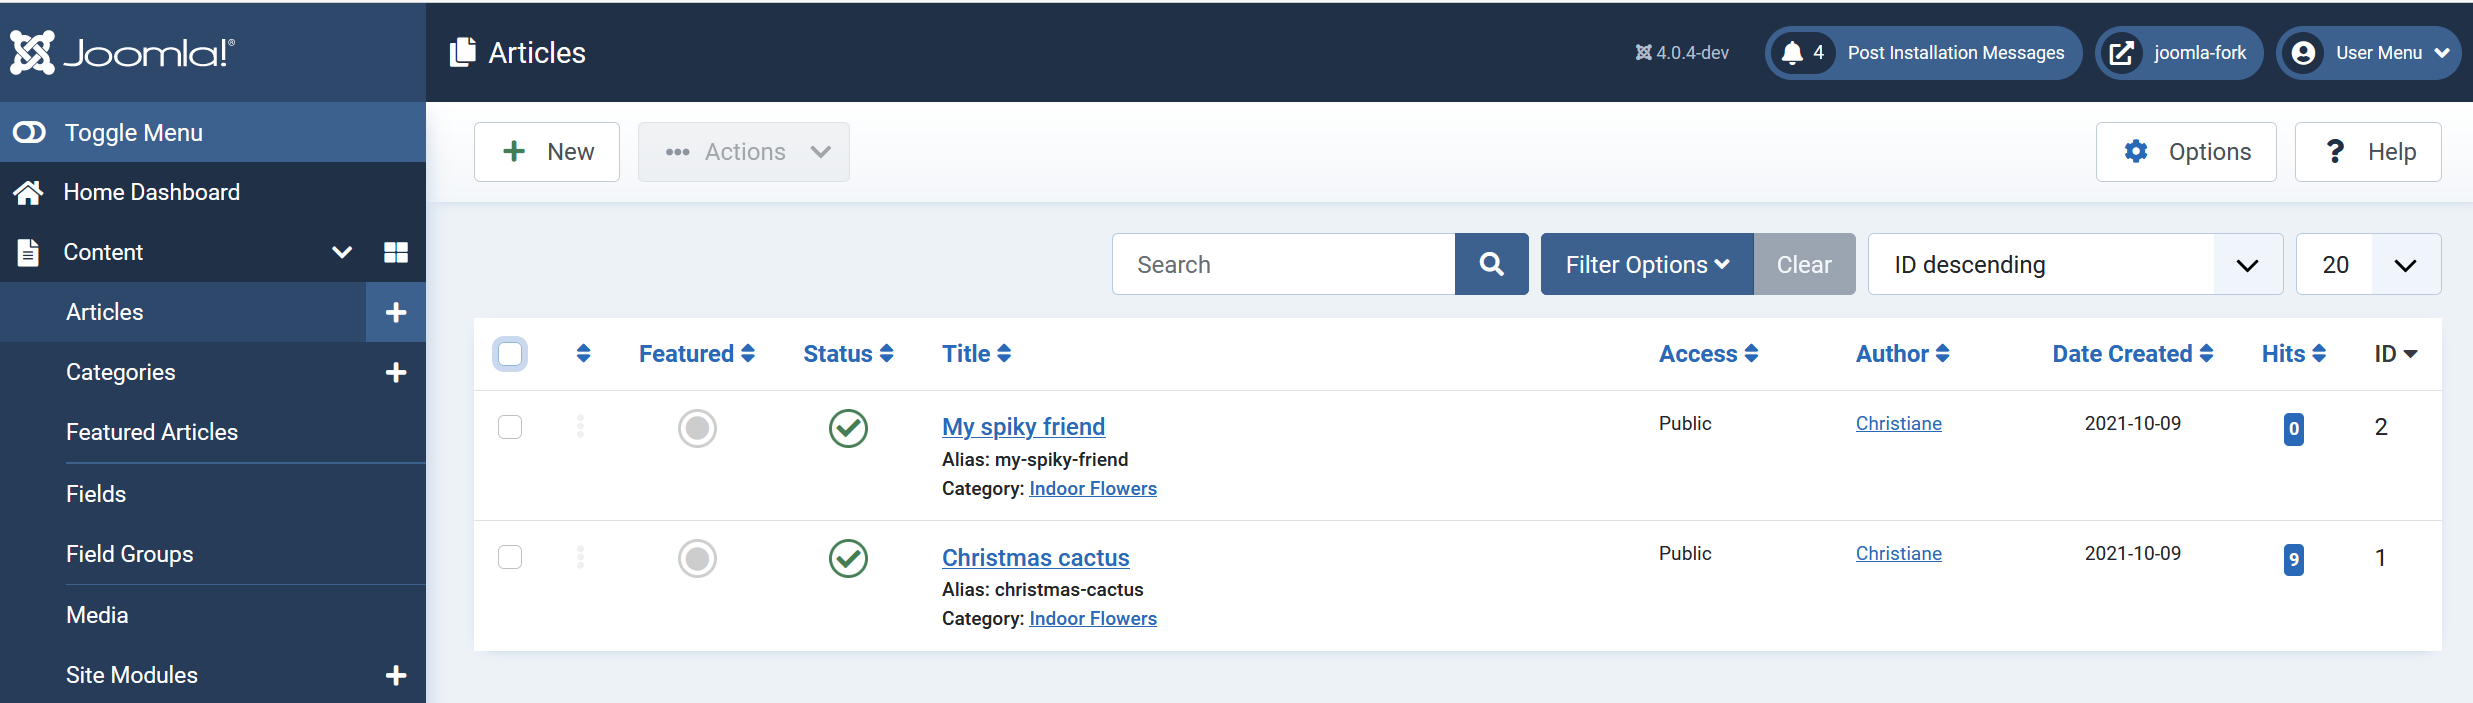
How do I filter articles?
Big sites have hundreds and thousands of articles. If you want to find specific articles, you can search for it with a search string (i.e. “cactus”) - or you can use a filter. You can also sort on all kinds of orders, like Publication date, Title, Hits, and even Author.
